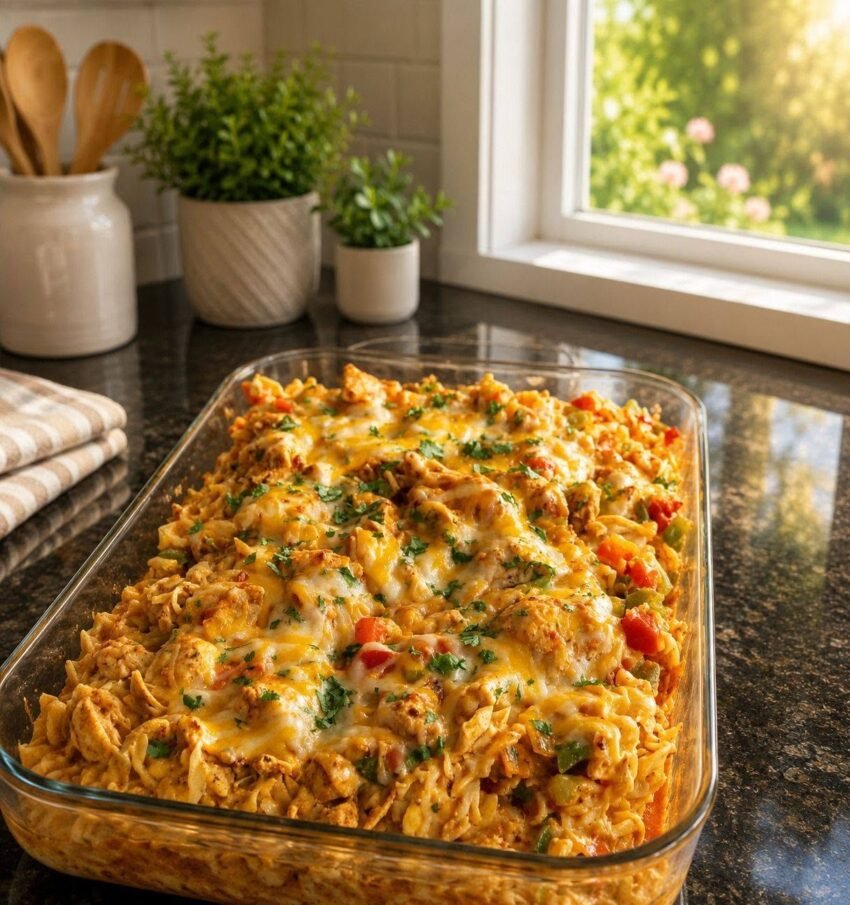
If you’re looking for a comforting family dinner that combines the bold flavors of chicken fajitas with the creamy, satisfying texture of a casserole, this Cheesy Fajita Chicken Casserole is an excellent choice. Tender chicken, colorful bell peppers, zesty fajita seasoning, and plenty of melted cheese come together in a dish that’s easy to prepare and perfect for busy weeknights. The casserole can be served on its own or paired with rice, tortillas, or a fresh salad for a complete meal.
Why You’ll Love This Recipe
This casserole delivers all the flavors of traditional fajitas without the need to stand over the stove cooking individual portions. Everything is layered into one baking dish, making preparation simple and cleanup minimal. The combination of juicy chicken, sautéed vegetables, creamy sauce, and melted cheese creates a rich and satisfying meal that appeals to both adults and children.
Ingredients
For the Chicken and Vegetables
- 2 pounds (900g) boneless, skinless chicken breasts, cut into bite-sized pieces
- 3 bell peppers (red, yellow, and green), sliced thinly
- 1 large onion, sliced
- 2 tablespoons olive oil
For the Fajita Seasoning
- 1 tablespoon chili powder
- 1 teaspoon paprika
- 1 teaspoon garlic powder
- 1 teaspoon onion powder
- 1 teaspoon ground cumin
- ½ teaspoon dried oregano
- ½ teaspoon salt
- ¼ teaspoon black pepper
For the Creamy Cheese Mixture
- 8 ounces (225g) cream cheese, softened
- ½ cup sour cream
- 1 can (10 ounces) diced tomatoes with green chilies, drained
- 2 cups shredded cheddar cheese
- 1 cup shredded Monterey Jack cheese
Optional Garnishes
- Chopped fresh cilantro
- Sliced green onions
- Diced avocado
- Sour cream
- Lime wedges
Equipment Needed
- Large skillet
- Mixing bowl
- 9×13-inch baking dish
- Wooden spoon or spatula
- Aluminum foil (optional)
Preparation Time
- Prep Time: 20 minutes
- Cook Time: 35 minutes
- Total Time: 55 minutes
- Servings: 6–8
Step-by-Step Directions
Step 1: Preheat the Oven
Preheat your oven to 375°F (190°C).
Lightly grease a 9×13-inch baking dish with cooking spray or a small amount of oil. Set aside while preparing the filling.
Step 2: Prepare the Fajita Seasoning
In a small bowl, combine:
- Chili powder
- Paprika
- Garlic powder
- Onion powder
- Cumin
- Oregano
- Salt
- Black pepper
Mix thoroughly until evenly combined.
This homemade seasoning provides a balanced blend of smoky, savory, and slightly spicy flavors.
Step 3: Season the Chicken
Place the chicken pieces in a large bowl.
Sprinkle about three-quarters of the fajita seasoning mixture over the chicken and toss well to coat every piece evenly.
Reserve the remaining seasoning for the vegetables.
Allow the chicken to sit for about 5 minutes while you prepare the skillet.
Step 4: Cook the Chicken
Heat 1 tablespoon olive oil in a large skillet over medium-high heat.
Add the seasoned chicken and cook for 6–8 minutes, stirring occasionally, until lightly browned and nearly cooked through.
The chicken does not need to be fully cooked at this stage because it will continue cooking in the oven.
Transfer the chicken to a plate and set aside.
Step 5: Sauté the Vegetables
In the same skillet, add the remaining tablespoon of olive oil.
Add:
- Sliced bell peppers
- Sliced onion
Sprinkle the reserved fajita seasoning over the vegetables.
Cook for approximately 5–7 minutes, stirring frequently, until the vegetables soften slightly while still maintaining some texture.
Remove from heat.
Step 6: Make the Creamy Filling
In a large mixing bowl, combine:
- Softened cream cheese
- Sour cream
- Drained diced tomatoes with green chilies
Stir until smooth and well blended.
Next, add:
- 1 cup cheddar cheese
- ½ cup Monterey Jack cheese
Mix until evenly distributed throughout the creamy base.
Step 7: Combine All Ingredients
Add the cooked chicken and sautéed vegetables to the creamy cheese mixture.
Stir thoroughly until every piece of chicken and vegetable is coated with the creamy sauce.
The mixture should look rich, colorful, and evenly combined.
Step 8: Assemble the Casserole
Transfer the mixture into the prepared baking dish.
Spread it evenly with a spatula to create a uniform layer.
Top with the remaining:
- 1 cup cheddar cheese
- ½ cup Monterey Jack cheese
Cover the dish loosely with foil if you prefer a softer cheese topping.
For a golden, slightly browned top, leave the casserole uncovered.
Step 9: Bake
Place the baking dish in the preheated oven.
Bake for 25–30 minutes, or until:
- The casserole is bubbling around the edges.
- The cheese is fully melted.
- The chicken reaches an internal temperature of 165°F (74°C).
If desired, remove the foil during the last 10 minutes of baking to encourage browning.
Step 10: Rest Before Serving
Remove the casserole from the oven.
Allow it to rest for 5–10 minutes before serving.
Resting helps the casserole set and makes it easier to portion.
Serving Suggestions
This Cheesy Fajita Chicken Casserole pairs wonderfully with:
- Mexican rice
- Cilantro lime rice
- Warm flour tortillas
- Corn tortillas
- Tortilla chips
- Black beans
- Fresh green salad
- Guacamole
For extra freshness, squeeze a little lime juice over each serving just before eating.
Storage and Reheating
Refrigerator
Store leftovers in an airtight container for up to 4 days.
Freezer
Freeze individual portions or the entire casserole for up to 3 months.
Thaw overnight in the refrigerator before reheating.
Reheating
Reheat in a 350°F (175°C) oven for 15–20 minutes or microwave individual portions until heated through.
Recipe Tips for Success
- Use rotisserie chicken to save time.
- Mix different cheeses for a richer flavor profile.
- Add sliced jalapeños for extra heat.
- Avoid overcooking the vegetables; they should retain a slight bite.
- Let the cream cheese soften fully before mixing to ensure a smooth sauce.
- Freshly shredded cheese melts more smoothly than pre-packaged shredded cheese.
This Cheesy Fajita Chicken Casserole is a hearty, flavor-packed meal that combines the best parts of fajitas and comfort-food casseroles into one easy dish. It’s creamy, cheesy, colorful, and satisfying enough to become a regular addition to your dinner rotation.