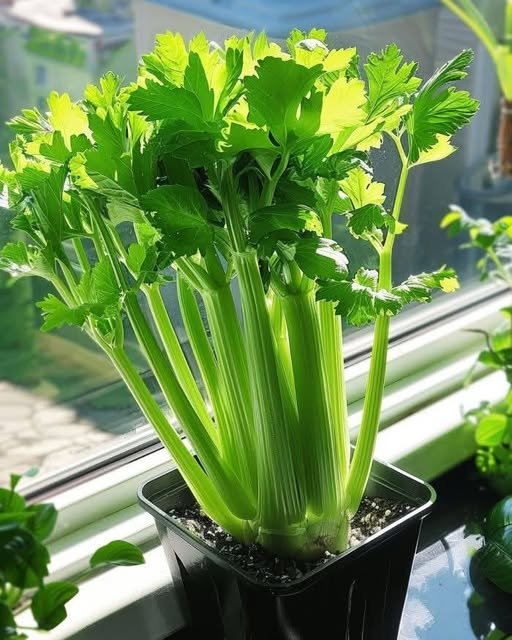
Grow a Never-Ending Supply of Celery at Home in a Pot: Step-by-Step Guide
Growing celery at home in a pot is one of those surprisingly satisfying gardening hacks. Instead of buying a whole new bunch every time, you can regrow it from scraps and keep harvesting fresh stalks over and over again. While it’s not truly “never-ending,” with the right care you can keep a continuous supply going for months.
Here’s a clear, step-by-step guide to doing it successfully.
Why Grow Celery at Home?
Celery (Apium graveolens) is:
- Easy to regrow from kitchen scraps
- Perfect for small pots or balcony gardens
- A steady source of fresh cooking greens
- Packed with hydration and nutrients
Instead of tossing the base, you can turn it into a new plant.
Step 1: Save the Celery Base
Start with a fresh bunch of celery.
- Cut off the stalks, leaving about 2–3 inches of the base (the root end)
- Make sure the base is intact and not damaged
This leftover stump is what will regrow.
Step 2: Start Regrowth in Water
Place the celery base in a shallow bowl of water.
- Fill water halfway up the base
- Place it in bright, indirect sunlight (a windowsill works well)
- Change water every 1–2 days
Within a few days:
- The center will start to grow new leaves
- Tiny roots may begin forming at the bottom
Wait about 5–7 days before moving to soil.
Step 3: Transfer to a Pot
Once you see new growth and small roots, it’s time to plant.
What you need:
- A medium-sized pot (at least 20–25 cm deep)
- Well-draining potting soil
- A sunny location
How to plant:
- Fill the pot with soil, leaving space at the top
- Place the celery base in the center
- Cover the base lightly, leaving new leaves above soil
- Water thoroughly
Step 4: Give It the Right Light
Celery loves consistent light but not harsh heat.
- Best: 5–6 hours of bright, indirect sunlight daily
- Indoors: a sunny windowsill or grow light
Too little light = weak, thin stalks.
Step 5: Water Consistently (This Is Key)
Celery is mostly water, so it needs steady moisture.
- Keep soil consistently damp but not soggy
- Water when the top inch of soil feels dry
- Never let it fully dry out
Dry soil = tough, bitter celery.
Step 6: Feed for Continuous Growth
Every 2–3 weeks:
- Add a mild liquid fertilizer or compost tea
This helps keep growth strong so you can harvest repeatedly.
Step 7: Harvest the Right Way
After 3–5 weeks in soil, your celery will be ready for harvesting.
- Cut outer stalks first
- Leave the inner core intact
- This allows continuous regrowth
With good care, you can harvest multiple times from one plant.
Step 8: Keep It Going (“Never-Ending” Trick)
To maintain a continuous supply:
- Start a new celery base every 2–3 weeks
- Stagger planting cycles in different pots
- Replace old plants when they weaken
This rotation creates an ongoing supply rather than a single harvest.
Common Mistakes to Avoid
1. Letting soil dry out
Celery will become stringy and bitter.
2. Too much direct sun
Can cause wilting or burning.
3. Harvesting too aggressively
Removing the inner growth point stops regrowth.
Final Thoughts
Growing celery (Apium graveolens) in a pot is one of the easiest ways to reduce food waste and enjoy fresh greens at home. While it won’t grow forever from a single plant, careful watering, proper light, and staggered planting can give you a steady, almost continuous supply.
If you want, I can also show you how to regrow other kitchen scraps like green onions, lettuce, or basil the same way.