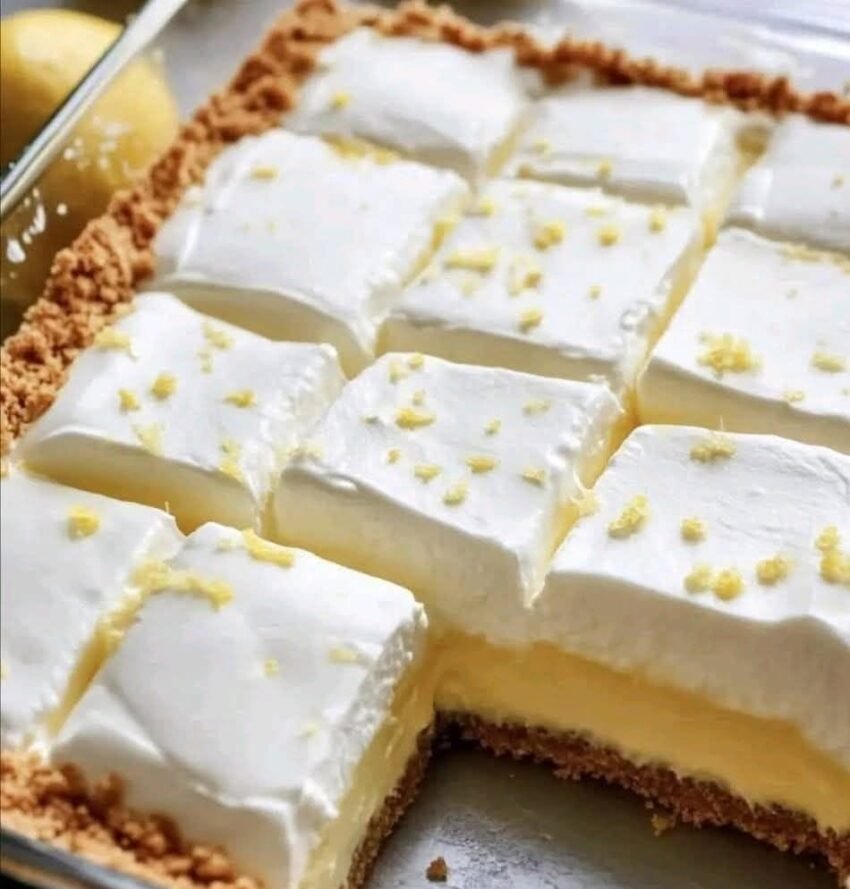
These creamy lemon cheesecake no-bake cheesecake bars feature a buttery biscuit crust and a silky lemon filling. Easy to make, refreshing, and perfect for summer gatherings, parties, or a make-ahead dessert.
Lemon Cheesecake No-Bake Cheesecake Bars Recipe
There is something irresistible about a chilled lemon dessert. These no-bake lemon cheesecake bars combine the rich creaminess of classic cheesecake with the bright, refreshing flavor of fresh lemons. Because they require no oven time, they are an excellent choice for warm days when you want an elegant dessert without the extra effort of baking.
The buttery biscuit base provides a crisp foundation, while the smooth lemon cheesecake layer delivers a perfect balance of sweetness and tanginess. These bars can be prepared in advance, making them ideal for family dinners, picnics, celebrations, or afternoon treats.
Preparation Time
- Prep Time: 25 minutes
- Chilling Time: 6 hours or overnight
- Total Time: 6 hours 25 minutes
- Servings: 12 bars
Ingredients
For the Biscuit Crust
- 2 cups (200 g) graham cracker crumbs or digestive biscuit crumbs
- ½ cup (115 g) unsalted butter, melted
- 2 tablespoons granulated sugar
For the Lemon Cheesecake Filling
- 16 oz (450 g) cream cheese, softened
- 1 cup (240 ml) heavy whipping cream, cold
- ¾ cup (150 g) granulated sugar
- ⅓ cup (80 ml) freshly squeezed lemon juice
- 1 tablespoon lemon zest
- 1 teaspoon vanilla extract
Optional Lemon Topping
- Thin lemon slices
- Extra lemon zest
- Whipped cream
Equipment Needed
- 8-inch square baking pan
- Parchment paper
- Mixing bowls
- Electric hand mixer or stand mixer
- Rubber spatula
- Measuring cups and spoons
Step-by-Step Directions
Step 1: Prepare the Pan
Line an 8-inch square baking pan with parchment paper, leaving some overhang on the sides. This will make it easier to lift the cheesecake out of the pan after chilling.
Set the prepared pan aside.
Step 2: Make the Biscuit Crust
In a medium mixing bowl, combine:
- Graham cracker crumbs
- Melted butter
- Granulated sugar
Mix thoroughly until the crumbs resemble wet sand.
Transfer the mixture to the prepared pan.
Using the back of a spoon, measuring cup, or flat-bottomed glass, firmly press the crumbs into an even layer.
Place the pan in the refrigerator while preparing the filling.
Step 3: Whip the Cream
Pour the cold heavy whipping cream into a chilled mixing bowl.
Using an electric mixer, beat on medium-high speed until stiff peaks form.
The whipped cream should hold its shape when the beaters are lifted.
Place the whipped cream in the refrigerator while preparing the cheesecake mixture.
Step 4: Prepare the Cream Cheese Mixture
In a large mixing bowl, add:
- Softened cream cheese
- Granulated sugar
Beat until smooth and creamy with no lumps remaining.
This usually takes about 2 to 3 minutes.
Step 5: Add the Lemon Flavor
To the cream cheese mixture, add:
- Fresh lemon juice
- Lemon zest
- Vanilla extract
Beat again until fully incorporated and smooth.
The mixture should be creamy and lightly thickened.
Step 6: Fold in the Whipped Cream
Remove the whipped cream from the refrigerator.
Using a rubber spatula, gently fold the whipped cream into the lemon cream cheese mixture.
Work slowly and carefully to maintain the airy texture.
Continue folding until no streaks remain and the filling looks smooth and fluffy.
Step 7: Assemble the Cheesecake Bars
Remove the chilled crust from the refrigerator.
Pour the lemon cheesecake filling over the crust.
Spread evenly using an offset spatula or the back of a spoon.
Smooth the top for a clean finish.
Step 8: Chill Until Set
Cover the pan with plastic wrap or foil.
Place in the refrigerator for at least 6 hours, preferably overnight.
The cheesecake should be firm enough to slice cleanly.
Step 9: Slice and Serve
Once fully chilled, lift the cheesecake out of the pan using the parchment paper overhang.
Place on a cutting board.
Using a sharp knife, cut into 12 bars.
For cleaner slices, wipe the knife with a damp cloth between cuts.
Step 10: Garnish
Decorate with:
- Fresh lemon zest
- Lemon slices
- Whipped cream
Serve cold for the best texture and flavor.
Tips for Perfect No-Bake Cheesecake Bars
Use Room-Temperature Cream Cheese
Softened cream cheese blends more smoothly and prevents lumps in the filling.
Use Fresh Lemon Juice
Freshly squeezed lemon juice provides a brighter and more natural citrus flavor than bottled juice.
Chill Overnight
While six hours is enough, overnight chilling produces firmer bars and cleaner slices.
Do Not Overmix
Once the whipped cream is added, fold gently to keep the filling light and airy.
Storage Instructions
Refrigerator
Store cheesecake bars in an airtight container in the refrigerator for up to 5 days.
Freezer
Freeze individual bars in a freezer-safe container for up to 2 months.
Thaw overnight in the refrigerator before serving.
Frequently Asked Questions
Can I Use Digestive Biscuits Instead of Graham Crackers?
Yes. Digestive biscuits work beautifully and provide a rich, buttery flavor.
Can I Make These Ahead of Time?
Absolutely. These bars are best when prepared a day in advance.
Can I Add More Lemon Flavor?
Yes. Increase the lemon zest by an additional teaspoon for a stronger citrus taste without affecting the texture.
Final Thoughts
These lemon cheesecake no-bake cheesecake bars are creamy, refreshing, and wonderfully simple to prepare. With their buttery crust and silky lemon filling, they deliver all the flavor of traditional cheesecake without the need for baking. Whether you’re entertaining guests or preparing a make-ahead dessert for the week, these bright and tangy cheesecake bars are sure to become a favorite.