Homemade Butterfinger Balls Recipe
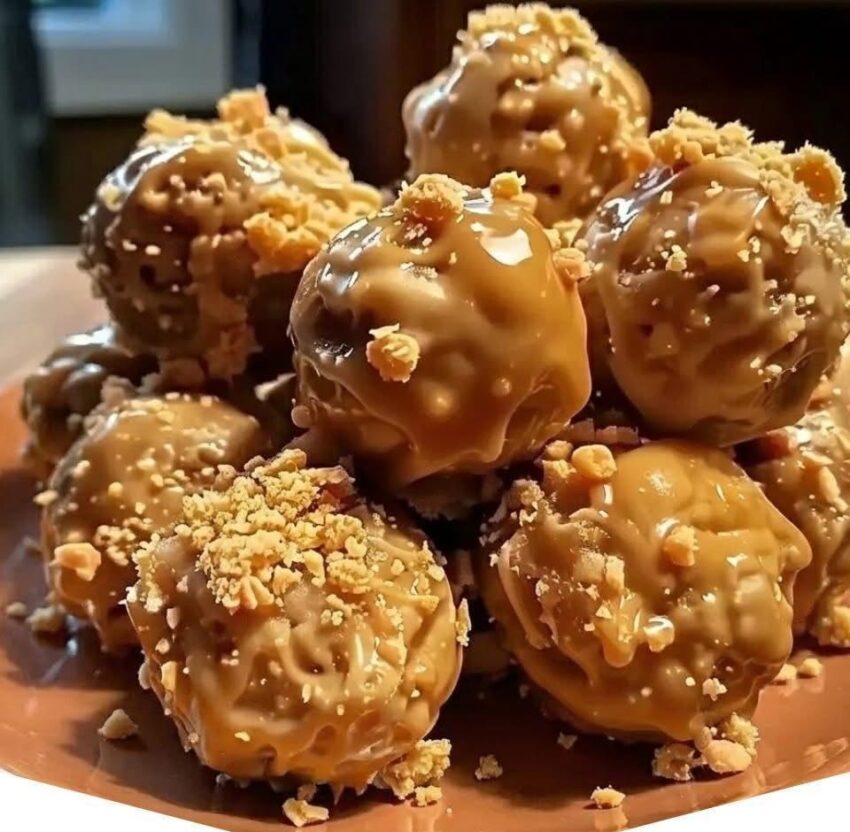
Homemade Butterfinger Balls are a fun, no-bake treat that combines creamy peanut butter with crushed Butterfinger candy bars, creating a sweet, crunchy filling coated in smooth chocolate. They’re similar to peanut butter truffles but with that signature toffee-like crunch that makes them irresistible.
These bite-sized desserts are perfect for holidays, dessert trays, or anytime you want a quick homemade candy with minimal effort.
Why You’ll Love This Recipe
- No baking required
- Quick and easy to make
- Sweet, crunchy, and chocolatey
- Perfect for gifting or parties
- Freezer-friendly
- Only a few simple ingredients
Recipe Details
- Prep Time: 20 minutes
- Chill Time: 30–45 minutes
- Total Time: About 1 hour
- Yield: 24–30 balls
Ingredients
For the Filling
- 1 cup creamy peanut butter
- ½ cup unsalted butter, softened
- 2 cups powdered sugar
- 1½ cups crushed Butterfinger candy bars
- 1 cup graham cracker crumbs
- 1 teaspoon vanilla extract
For the Coating
- 2 cups milk chocolate or semi-sweet chocolate chips
- 1 tablespoon coconut oil or vegetable shortening (optional, for smoother coating)
Equipment Needed
- Large mixing bowl
- Hand mixer or spoon
- Baking sheet
- Parchment paper
- Microwave-safe bowl or double boiler
Step-by-Step Directions
Step 1: Prepare the Candy Bars
Place Butterfinger bars in a zip-top bag.
Crush them using a rolling pin until you have small crunchy pieces.
Set aside.
Step 2: Make the Filling
In a large bowl, beat together:
- Peanut butter
- Butter
- Vanilla extract
Mix until smooth and creamy.
Step 3: Add Dry Ingredients
Add:
- Powdered sugar
- Graham cracker crumbs
- Crushed Butterfinger pieces
Mix until a thick dough forms.
The mixture should be soft but rollable.
Step 4: Shape the Balls
Line a baking sheet with parchment paper.
Roll the mixture into 1-inch balls.
Place them on the prepared sheet.
Step 5: Chill
Refrigerate for 30–45 minutes until firm.
This makes dipping easier and cleaner.
Step 6: Melt the Chocolate
In a microwave-safe bowl, melt chocolate chips in 30-second intervals, stirring between each.
Add coconut oil if using for a smoother coating.
Step 7: Coat the Balls
Using a fork or dipping tool, dip each chilled ball into melted chocolate.
Let excess chocolate drip off.
Place back on parchment paper.
Step 8: Set the Chocolate
Refrigerate for 10–15 minutes or until the chocolate hardens completely.
Tips for Success
- Chill the filling before dipping to prevent melting.
- Use high-quality chocolate for best flavor.
- Don’t overheat chocolate—melt slowly.
- Roll evenly sized balls for consistent coating.
- Store chilled for best texture.
Variations
White Chocolate Butterfinger Balls
Coat with melted white chocolate for a sweeter twist.
Dark Chocolate Version
Use dark chocolate for a richer, less sweet flavor.
Extra Crunch Version
Add chopped peanuts or toffee bits to the filling.
Peanut Butter Cup Style
Add mini chocolate chips inside the filling for extra texture.
Storage Instructions
Refrigerator
Store in an airtight container for up to 1 week.
Freezer
Freeze for up to 2 months. Thaw in the fridge before serving.
Frequently Asked Questions
Can I use crunchy peanut butter?
Yes, but it will make the texture slightly less smooth.
Do I need Butterfinger candy bars?
Yes, they give the signature flavor and crunch. You can substitute with similar toffee-style candy if needed.
Why is my mixture too soft?
Add a little more powdered sugar or chill longer before rolling.
Final Thoughts
Homemade Butterfinger Balls are a simple yet addictive no-bake candy that combines creamy peanut butter, crunchy candy pieces, and a smooth chocolate coating. They’re easy to prepare, perfect for sharing, and guaranteed to disappear quickly at any gathering.