Make soft, fluffy homemade dinner rolls from scratch with this easy step-by-step recipe. These buttery yeast rolls are light, tender, and perfect for holidays, family dinners, and everyday meals.
Homemade Dinner Rolls
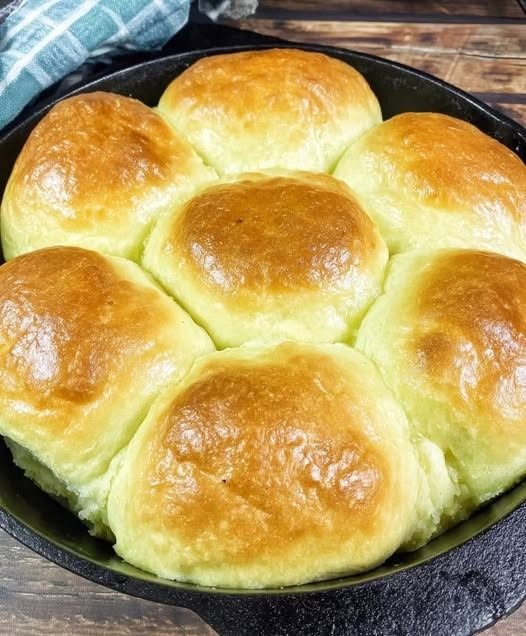
Nothing compares to the aroma of freshly baked homemade dinner rolls straight from the oven. With their golden tops, pillowy-soft interiors, and rich buttery flavor, these classic rolls are the perfect addition to holiday feasts, Sunday suppers, and weeknight dinners alike.
This foolproof recipe creates light and fluffy rolls with a tender crumb and a beautiful golden crust. Whether you’re an experienced baker or making yeast rolls for the first time, these dinner rolls are simple to prepare and guaranteed to impress.
Why You’ll Love This Recipe
- Soft and fluffy texture
- Rich buttery flavor
- Easy-to-follow instructions
- Perfect for holidays and family meals
- Great for make-ahead baking
- Freezer-friendly
Recipe Details
- Prep Time: 20 minutes
- Rise Time: 1 hour 30 minutes
- Bake Time: 18–22 minutes
- Total Time: About 2 hours 15 minutes
- Yield: 12 rolls
- Difficulty: Easy
Ingredients
For the Dough
- 1 cup warm whole milk (110°F/43°C)
- 2¼ teaspoons active dry yeast (1 packet)
- ¼ cup granulated sugar
- 1 large egg, room temperature
- ¼ cup unsalted butter, melted
- 1 teaspoon salt
- 3 to 3½ cups all-purpose flour
For Brushing
- 2 tablespoons unsalted butter, melted
Equipment Needed
- Large mixing bowl
- Measuring cups and spoons
- Stand mixer with dough hook (optional)
- 9-inch baking pan or 9×13-inch baking dish
- Clean kitchen towel
Step-by-Step Directions
Step 1: Activate the Yeast
In a large mixing bowl, combine the warm milk, yeast, and sugar.
Stir gently and let the mixture sit for 5–10 minutes until foamy.
If the mixture does not become foamy, the yeast may be inactive and should be replaced.
Step 2: Add the Wet Ingredients
Add the egg, melted butter, and salt to the yeast mixture.
Whisk until well combined.
Step 3: Form the Dough
Add 3 cups of flour, one cup at a time, mixing after each addition.
Continue mixing until a soft dough forms.
If the dough is too sticky, add the remaining flour a little at a time until it becomes manageable.
The dough should be soft and slightly tacky but not overly sticky.
Step 4: Knead the Dough
Turn the dough onto a lightly floured surface.
Knead for 8–10 minutes until smooth and elastic.
If using a stand mixer, knead with the dough hook on medium speed for about 5–6 minutes.
The dough is ready when it springs back gently when pressed.
Step 5: First Rise
Place the dough in a lightly greased bowl.
Turn it once to coat the surface.
Cover with a clean kitchen towel or plastic wrap.
Let rise in a warm place for 60–90 minutes, or until doubled in size.
Step 6: Shape the Rolls
Punch down the risen dough to release excess air.
Transfer it to a lightly floured surface.
Divide the dough into 12 equal portions.
Shape each piece into a smooth ball by pulling the edges underneath and pinching them together.
Step 7: Arrange in the Pan
Grease a baking dish or round cake pan.
Place the dough balls evenly in the pan, leaving a little space between each roll.
Cover loosely with a towel.
Step 8: Second Rise
Allow the shaped rolls to rise for 30–40 minutes until puffy and nearly doubled.
Meanwhile, preheat the oven to 375°F (190°C).
Step 9: Bake
Bake for 18–22 minutes, or until the tops are golden brown.
The rolls should sound slightly hollow when tapped.
Step 10: Brush with Butter
Remove the rolls from the oven.
Immediately brush the tops with melted butter.
This adds flavor and keeps the crust soft.
Step 11: Serve
Allow the rolls to cool for about 5 minutes before serving.
Enjoy warm with butter, jam, honey, or alongside your favorite meal.
Serving Suggestions
These homemade dinner rolls pair wonderfully with:
- Roast chicken
- Beef stew
- Holiday turkey dinners
- Ham and potato casseroles
- Soups and chili
- Thanksgiving and Christmas meals
They also make excellent sandwich rolls for leftovers.
Storage Instructions
Room Temperature
Store in an airtight container for up to 3 days.
Refrigerate
Store for up to 1 week, though room-temperature storage is recommended for the softest texture.
Freeze
Place cooled rolls in a freezer-safe bag and freeze for up to 3 months.
Thaw at room temperature and warm before serving.
Tips for Perfect Dinner Rolls
- Use warm milk, not hot milk, to avoid killing the yeast.
- Measure flour accurately to prevent dense rolls.
- Allow enough time for both rises.
- Avoid adding too much flour; soft dough produces softer rolls.
- Brush with butter immediately after baking for a tender crust.
- Bake until just golden to maintain a soft interior.
Frequently Asked Questions
Can I make the dough ahead of time?
Yes. After the first rise, cover and refrigerate the dough overnight. Bring it to room temperature before shaping.
Can I use instant yeast?
Yes. Use the same amount and mix it directly with the dry ingredients.
Why are my rolls dense?
Dense rolls are often caused by too much flour, insufficient kneading, or not allowing enough rise time.
Can I make smaller rolls?
Absolutely. Divide the dough into 16–18 portions and reduce the baking time by a few minutes.
Final Thoughts
These Homemade Dinner Rolls are soft, buttery, and incredibly satisfying. With their fluffy texture and rich flavor, they elevate any meal from ordinary to memorable. Whether you’re preparing a holiday feast or a simple family dinner, this classic recipe delivers warm, bakery-quality rolls that everyone will love. Keep this recipe in your collection, and you’ll always have the perfect side dish for any occasion.