Homemade Vanilla Ice Cream
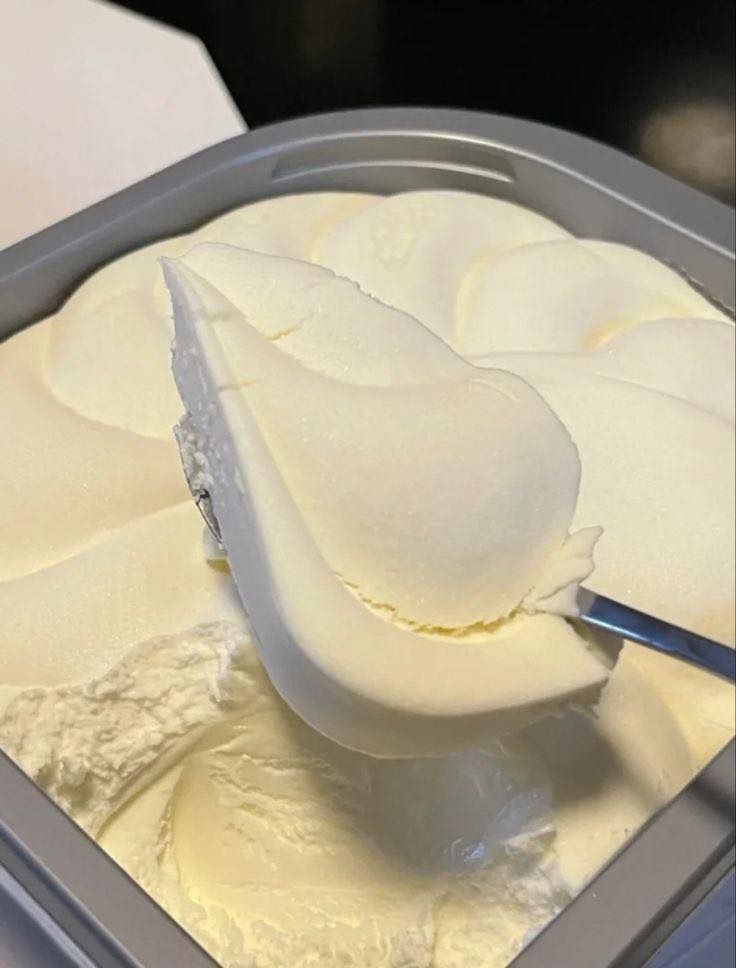
Homemade vanilla ice cream is a timeless dessert loved for its rich flavor, creamy texture, and versatility. Made with real vanilla, fresh cream, and simple pantry ingredients, this classic recipe delivers a luxurious frozen treat that tastes far better than many store-bought varieties.
Whether served on its own, paired with pies and cakes, or topped with fresh fruit, homemade vanilla ice cream is always a crowd-pleaser.
Why You’ll Love This Recipe
- Rich and creamy texture
- Made with simple ingredients
- Real vanilla flavor
- Easy to customize with mix-ins
- Perfect for family gatherings and celebrations
Recipe Information
Prep Time: 20 minutes
Cooking Time: 15 minutes
Chilling Time: 4 hours
Churning Time: 20–30 minutes
Total Time: Approximately 5 hours
Servings: 8 servings
Ingredients
Ice Cream Base
- 2 cups heavy cream
- 1 cup whole milk
- ¾ cup granulated sugar
- 4 large egg yolks
- 1 tablespoon pure vanilla extract
- 1 pinch salt
Equipment Needed
- Medium saucepan
- Mixing bowls
- Whisk
- Fine-mesh strainer
- Ice cream maker
- Airtight freezer container
Step 1: Heat the Milk and Cream
In a medium saucepan, combine:
- Heavy cream
- Whole milk
- Half of the sugar (⅜ cup)
- Salt
Heat over medium heat until the mixture is hot and steaming.
Do not allow it to boil.
Stir occasionally to dissolve the sugar completely.
Step 2: Prepare the Egg Mixture
In a separate bowl, whisk together:
- Egg yolks
- Remaining sugar
Continue whisking until the mixture becomes pale yellow and slightly thickened.
This process helps create a smooth and creamy custard base.
Step 3: Temper the Eggs
Slowly pour about ½ cup of the hot milk mixture into the egg yolks while whisking constantly.
Continue adding another ½ cup gradually.
Tempering prevents the eggs from scrambling when added to the hot liquid.
Step 4: Cook the Custard
Pour the tempered egg mixture back into the saucepan.
Cook over medium-low heat while stirring constantly with a wooden spoon or heat-resistant spatula.
Cook until the custard thickens enough to coat the back of a spoon.
The custard should reach approximately 170–175°F (77–80°C).
Do not boil.
Step 5: Strain the Custard
Remove the saucepan from the heat.
Pour the custard through a fine-mesh strainer into a clean bowl.
This removes any small bits of cooked egg and ensures a silky-smooth texture.
Step 6: Add Vanilla
Stir in:
- Vanilla extract
Mix thoroughly until fully incorporated.
The warm custard will help release the vanilla’s aroma and flavor.
Step 7: Chill the Mixture
Cover the bowl with plastic wrap, pressing it directly onto the surface of the custard.
Refrigerate for at least 4 hours or overnight.
The mixture must be thoroughly chilled before churning.
Step 8: Churn the Ice Cream
Pour the chilled custard into your ice cream maker.
Churn according to the manufacturer’s instructions.
This usually takes 20–30 minutes.
The ice cream will become thick and resemble soft-serve ice cream.
Step 9: Freeze Until Firm
Transfer the churned ice cream into an airtight freezer-safe container.
Smooth the surface with a spatula.
Cover tightly and freeze for 3–4 hours or until firm.
Step 10: Serve
Remove the ice cream from the freezer 5 minutes before serving.
Scoop into bowls or cones and enjoy.
Optional Flavor Variations
Vanilla Bean Ice Cream
Replace vanilla extract with the seeds from 1 vanilla bean for an even richer flavor.
Chocolate Chip Vanilla Ice Cream
Fold in:
- 1 cup mini chocolate chips
during the final minutes of churning.
Cookies and Cream
Add:
- 10 crushed sandwich cookies
during the last few minutes of churning.
Strawberry Vanilla Ice Cream
Mix in:
- 1 cup finely chopped fresh strawberries
after churning.
Tips for the Best Homemade Ice Cream
Use High-Quality Vanilla
Pure vanilla extract or vanilla beans provide the best flavor.
Chill Thoroughly
A well-chilled custard freezes faster and creates a smoother texture.
Don’t Rush the Custard
Cooking slowly prevents curdling and results in a creamier ice cream.
Freeze Properly
Store ice cream in a shallow airtight container to reduce ice crystal formation.
Storage Instructions
Freezer
Store in an airtight container for up to 2 weeks for the best flavor and texture.
Prevent Freezer Burn
Place a piece of parchment paper or plastic wrap directly on the surface before sealing the container.
Frequently Asked Questions
Can I Make This Without an Ice Cream Maker?
Yes. Pour the chilled mixture into a freezer-safe container and freeze. Stir vigorously every 30 minutes for 3–4 hours to break up ice crystals until smooth and frozen.
Why Is My Ice Cream Icy?
Ice crystals usually form when:
- The mixture wasn’t chilled enough before freezing.
- The ice cream wasn’t stored properly.
- There is too much water content in the mixture.
Can I Use Low-Fat Milk?
You can, but the ice cream will be less rich and creamy. Whole milk and heavy cream provide the best results.
Final Thoughts
Homemade vanilla ice cream is a classic dessert that combines simple ingredients with rich flavor and a luxuriously creamy texture. By following this detailed step-by-step recipe, you can create a smooth and delicious frozen treat that rivals premium ice cream shops. Serve it on its own or pair it with your favorite desserts for a timeless indulgence everyone will love.